The Challenge
Creative code is a relatively new term and it’s often intimidating to know where to start or even what language to begin with!
What I have found to be the best approach with creative code is to experiment and play around with all the open source (free) codes on offer, particularly p5js.org
So, let’s work on some experimental coding art.
What materials do I need?
- Laptop/desktop computer or smartphone- brand does not matter*
- Internet access
- Account for editor p5.js
- QuickTime or any screen capturing software
*If you're keen to do more coding, a desktop or laptop screen will make things easier, but for this challenge a smartphone will be fine.
How long will I need to complete the challenge?
- Part 1: 30min including brief explanation to written code.
- Part 2: 30min + however long you want to continue experimenting with
Part 1: Get to know the code
The coding language we will be using is JavaScript or JS. It is one of the most popular programming languages and the easiest to start with. It is also the programming language of the world wide web!
We will be using the online web editor p5.js, which is a JavaScript library for creative coding. It is a free open-source drawing webpage that introduces you to various coding creative methods of art!
Before we start, have you made an account with p5.js?
This is a quick How to challenge, so the explanation towards coding language is brief.
All you need to understand now (and read later) is how code is drawn.
- The canvas uses a coordinate system of x-coordinate (horizontal) and y coordinate (vertical)
- An object drawn at (80, 50) is positioned 80 pixels to the right, 50pixels down from X

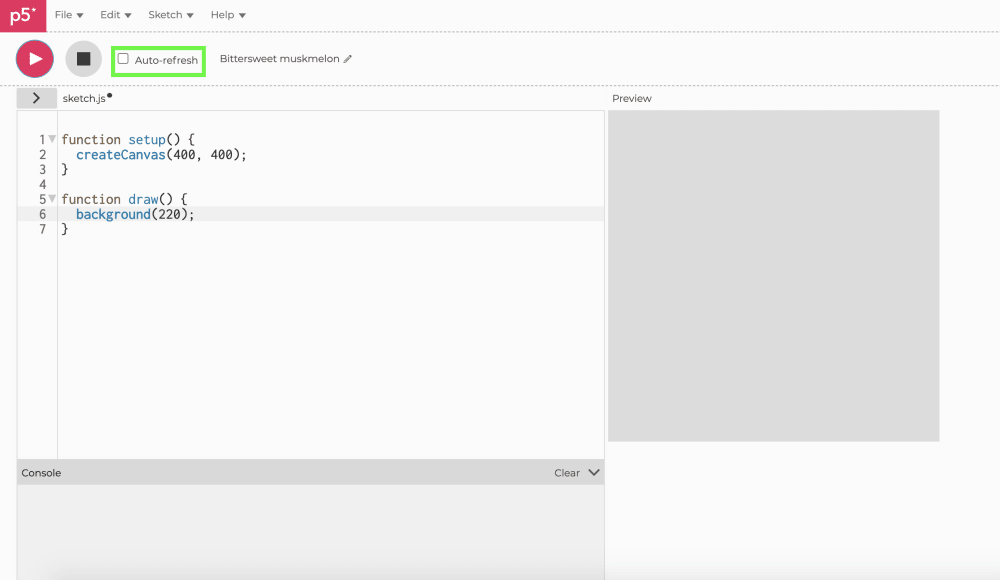
Once you have made an account with p5.js, we will start a new sketch like the one below:
- On the left side we have the code editor, where we will be writing out our ‘drawing’
- On the right side is the live image of the sketch we are coding
- If you tick the Auto-refresh box you can see the canvas change as you update the code
Copy the code below to the editor:
function setup() {
createCanvas(400, 400);
}
function draw() {
background(255,0,0);
ellipse(200, 200, 140, 140);
}
You can read about what each line of code means in p5js.org reference section but the code it pretty self-explanatory.
- We are creating a canvas size 400 by 400 pixels, with a function (a statement that preforms a task)
- A background colour of 255, 0, 0. (Colour values are measured as RGB values, so the background will be entirely red.)
- We are drawing an ellipse, a circle, at pixel value 200, 200 (drawn at the middle) at a size of 140, 140
This should be the final result:

You have coded your first minimalist, digital drawing!
Continue experimenting with different RGB values and other ways to change your drawing. Consider these pointers:
- 0 is black (or 'null' no colour at all), 255 is the full colour value- so experiment between those numbers to see what you get, switch the values around for example
- You can make your canvas the size of your screen window with the value of (windowWidth, windowHeight)
- You can draw multiple shapes on the canvas
- You can change the colour of the circle with a code below ellipse: fill(22, 255, 8); (what colour does that make?)
Head to p5js's reference section, scroll down to 'shape' and see what other shapes you can add to function draw.
Part 2: Experiment
Coding demo
Val demos inputting the code from part 2 below. Next she positions her mouse on the black square and activates the artwork by moving the mouse. Video: Val Toro.
Let’s create something a bit more interactive.
Erase the code beneath function draw and replace it with this:
function setup() {
createCanvas(400,400);
background(0);
noCursor();
}
function draw() {
circle(mouseX, mouseY, 50);
fill(255, 0, 0);
rect(mouseY, mouseX, 50);
fill(0,0,255);
}
function mousePressed() {
background(0,0,0);
}
What we are drawing now is:
- A circle and rectangle, where the x and y values are where the computer mouse is placed on the canvas
- They are going opposite directions because the X, Y values are switched round
- It has a pixel size of 50
- The shapes are filled in red and blue
We have created a new function where every time the mouse is pressed, the background returns to black.
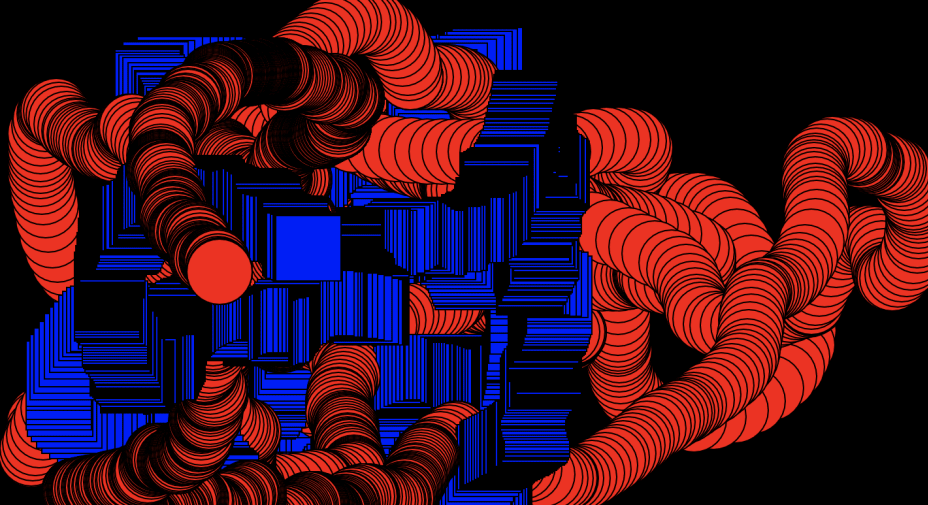
Here are 4 examples of my canvas:

You have successfully created a digital artwork with your mouse! There are endless possibilities of what artwork you can achieve with p5.js.
Use QuickTime or any screen capturing software to keep a record of your animated artwork that you've created.
Part 3: Go further
Your final challenge is to head over to p5.js 'Examples' section and experiment with how to personalise all the examples there are on offer. Use your new knowledge of RGB fill values and shapes. You can continue your learning of JavaScript in the 'Learn' section.

Think about:
- How can you use mouseX, mouseY to create digital drawings?
- what shapes can you use?
- can you draw with multiple shapes?
Happy coding!