Techniques: Make a mini studio
- Written byAlex Wojcik
- Published date 25 September 2018
Share story
You don’t need expensive equipment to get started. Good daylight, a camera phone and a few basic materials will do.
Alex shows you how to set up a DIY still life table and mini studio in her introductory video. Look out for her further tip below if time is not on your side and you need to photograph at night!
Make a mini-studio
Video: D.Waife, technique demonstrated by Alex Wojcik.
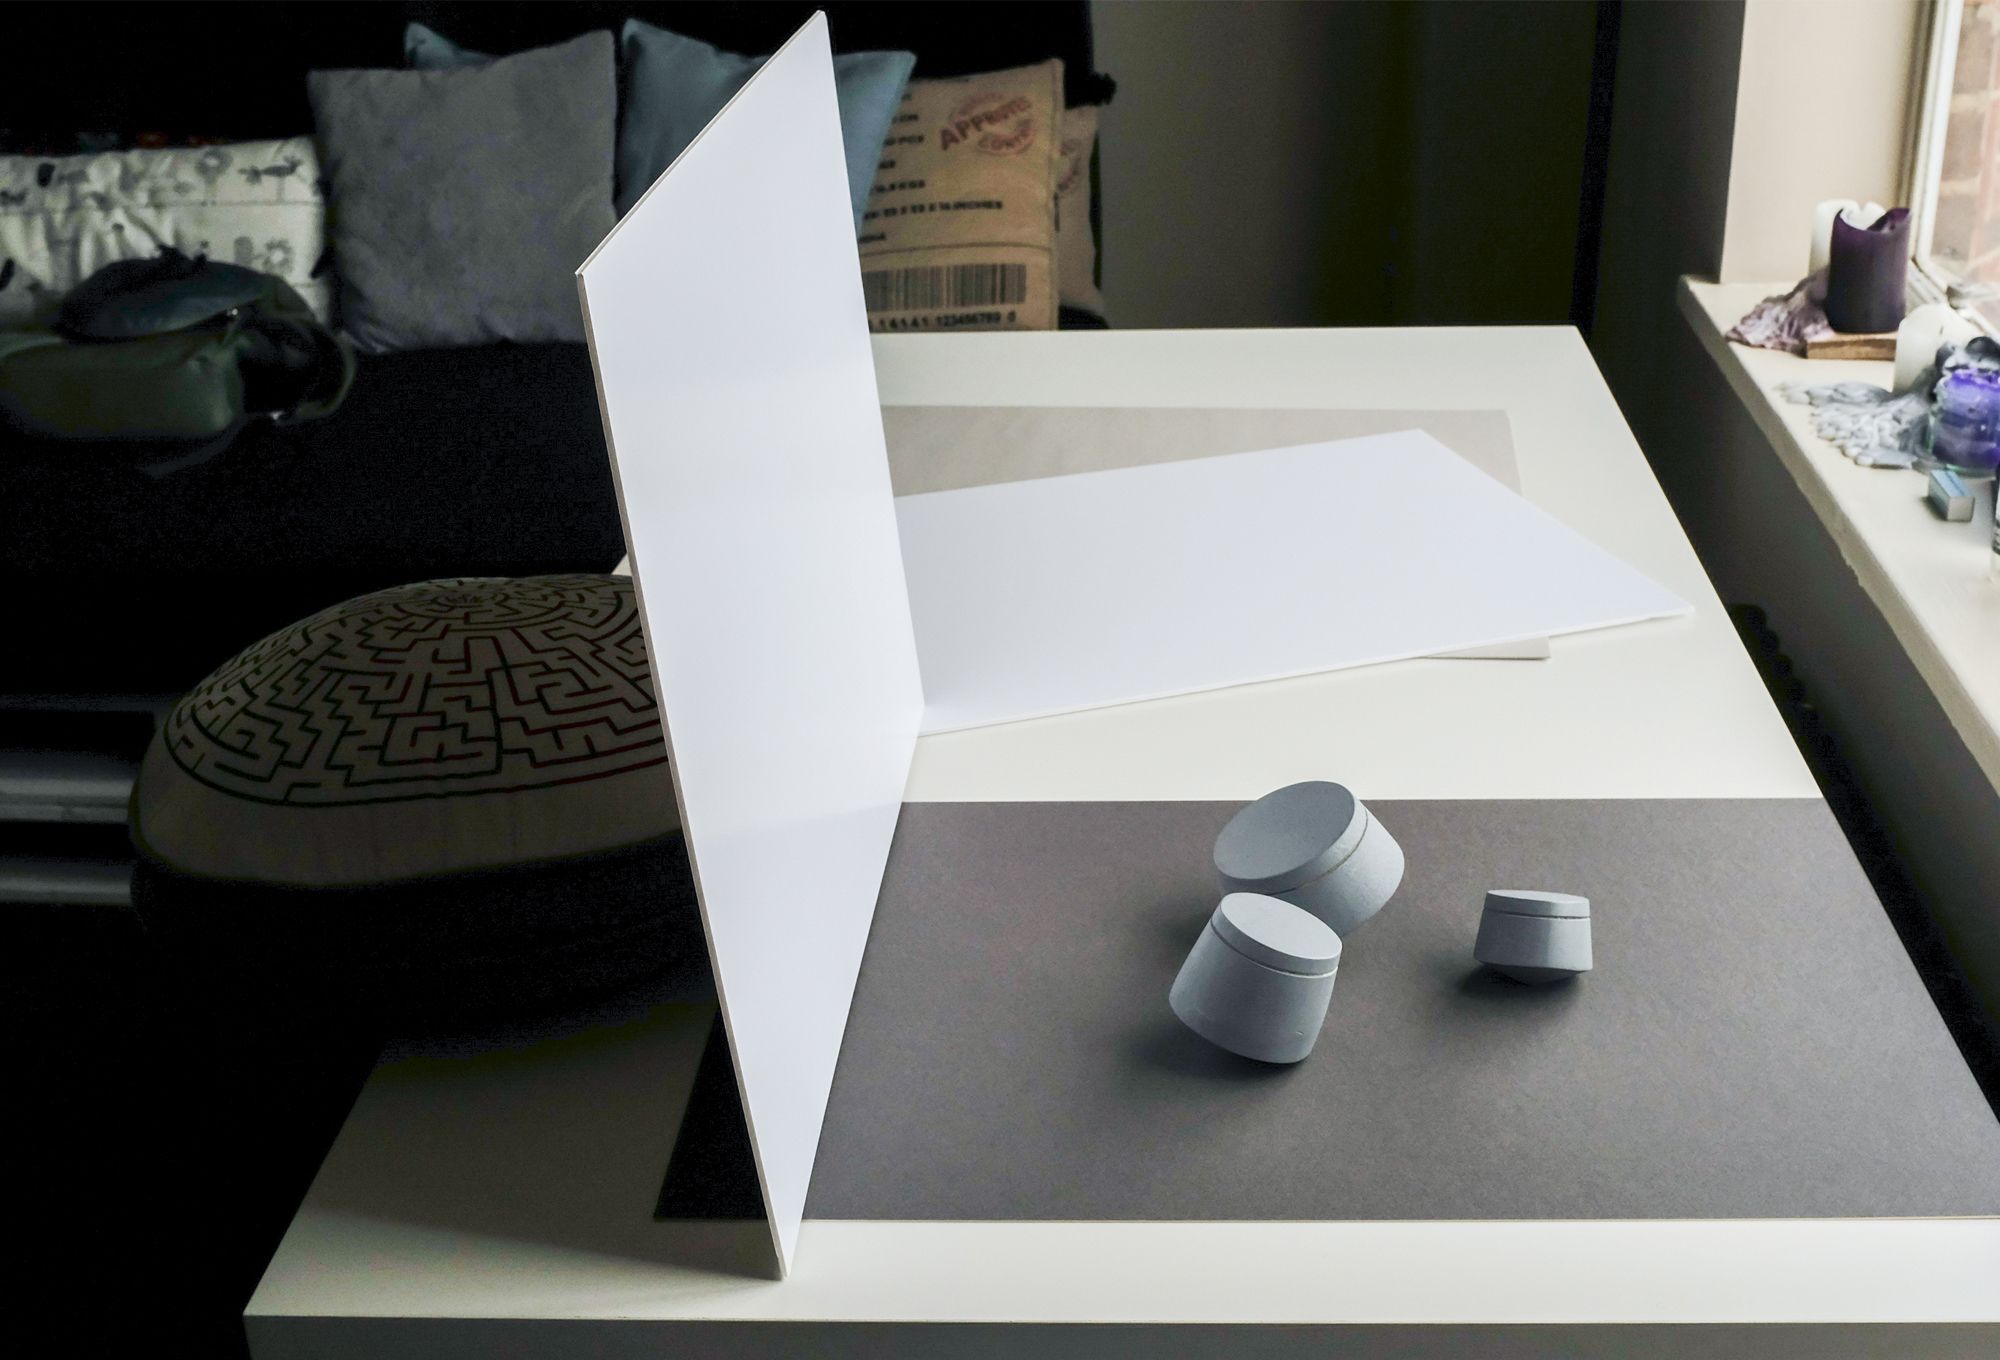
So, you can see how quick and easy it was to set up a mini studio. It’s something you can pull together at college or home. You’ll get the best results by taking photographs between noon and 3pm and the white foam board will really help to reflect the light.
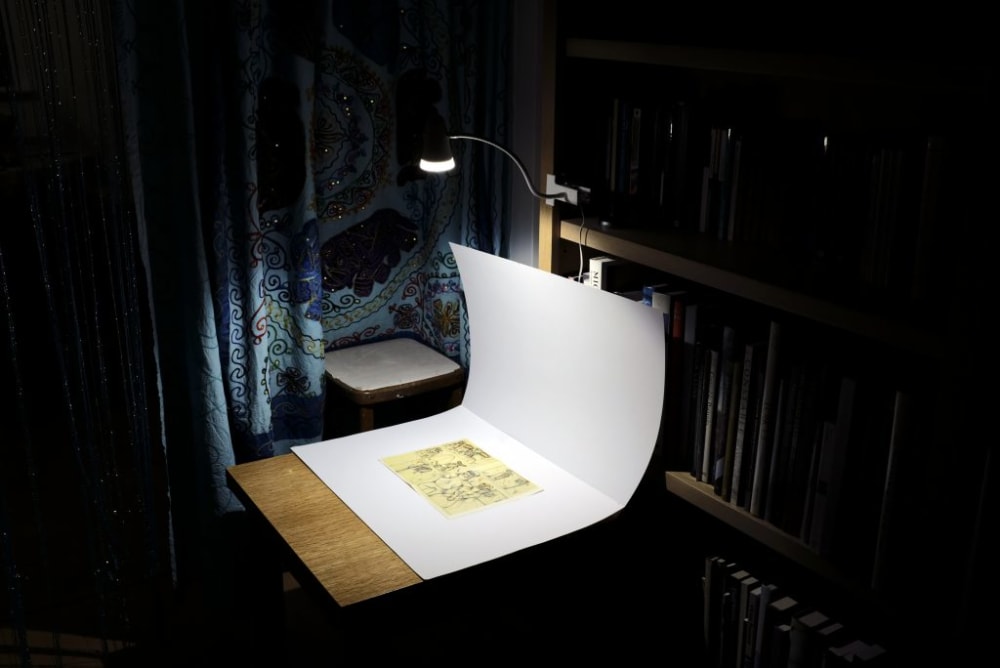
Make a night-time mini studio
Tip: And if daytime is not an option, and you really have to use artificial light to photograph your work, then this can be done by setting up your studio as Alex did in the picture above. Make sure your light is fixed over the centre of the image to avoid shadows being cast on or around your work. Also, if you don’t have any foam board handy, then a large sheet of white paper should do the trick.
This is a great ‘make’ for this time of year when you might be thinking about pulling together a portfolio. Take a look at the other articles in this series that will give you some tips on photographing 2D and 3D work as well as sketchbooks and large-scale work.